User authentication is one of the key features required in any application. Google’s Firebase provides really convenient and secure set of tools that allow us to authenticate and create users in our system. The best thing about Firebase is how easy it is to integrate OAuth with popular social networks. In this post, we are going to integrate Facebook OAuth into React Native + Expo using Firebase.
This method works on both Android and IOS. Following steps will be involved for this purpose:
- Installing Packages
- Setup Firebase Developer Console
- Setup Facebook Developer Account
- Implementing authentication using Firebase
Installing Packages
Okay, so we are going to use the Official Firebase SDK and Expo SDK’s Facebook packages in this project.
Run the following command to install firebase. You can use NPM or Yarn.
yarn add firebase
Install the facebook package using expo as it installs the package compatible with it.
expo install expo-facebook
Enable the Facebook Authentication
Create a new project on the Facebook Developers Page. After you have created the app, you have to add some configs to it, that allow facebook to communicate with our expo client app.
-
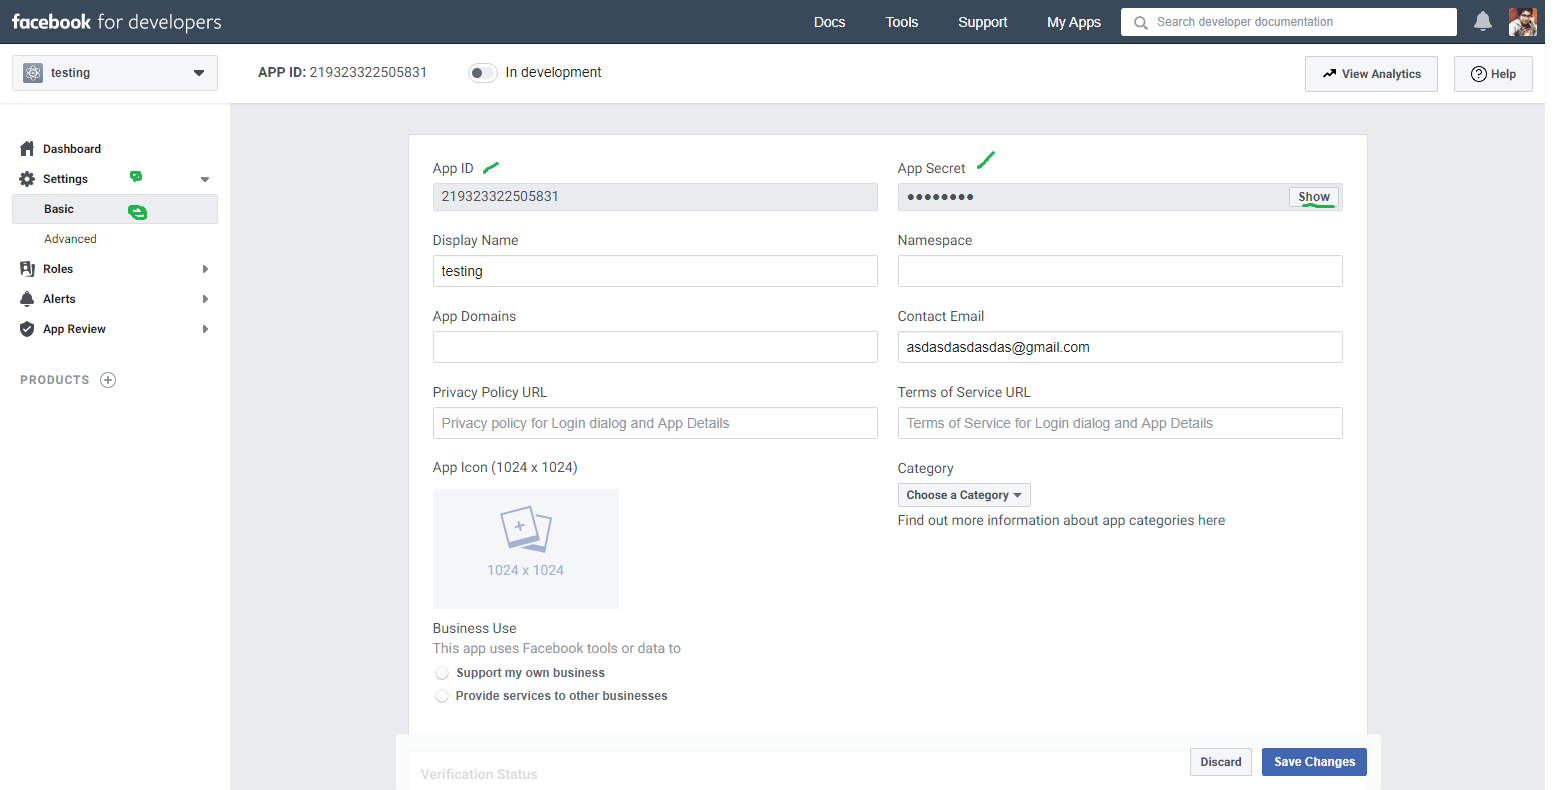
First, go to the App Settings Page. Save the App ID and App Secret to your notepad, we’ll need it later.
-
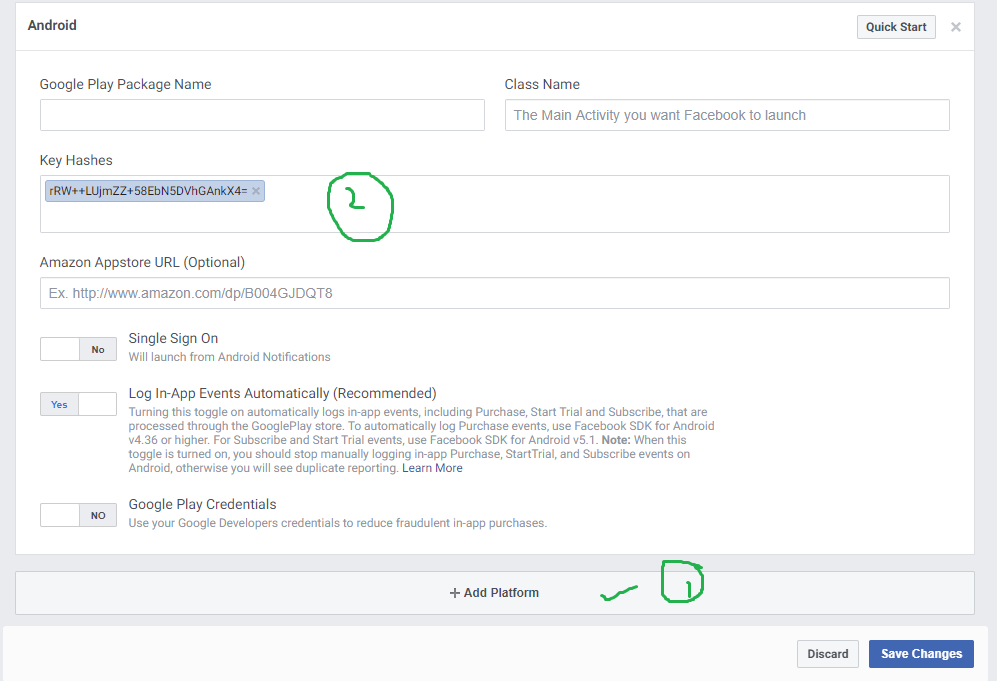
After than, you have to go to the bottom to the Add Platform button, and add android. In the android setting, you have to add this exact value rRW++LUjmZZ+58EbN5DVhGAnkX4= to the Hash Keys.
-
Then add the ios platform using above method. You’ll have to add this exact value host.exp.Exponent to the Bundle ID setting.

Note: The settings we have done so far are for expo client app that we are using for development purposes. However, when we create build apps also known as standalone android and ios apps, then we also have to add some more settings. I’ll create a separate post for that purpose.
Setting up Firebase Developer Console
I am assuming, you have already created a project and app on Firebase.
-
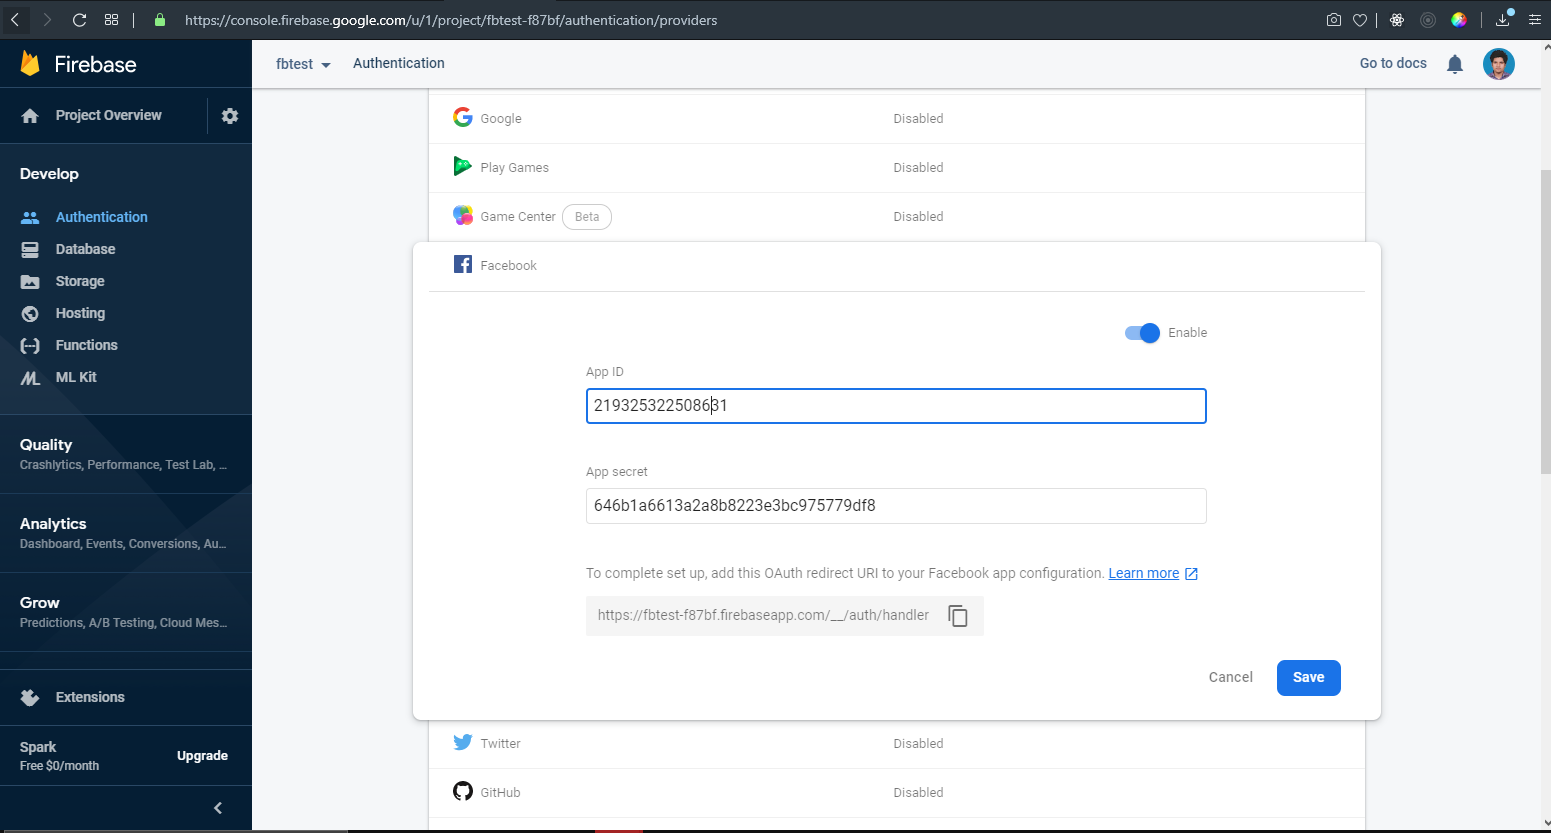
First lets, enable the Facebook Authentication. In order to do that go to the authentication tab, configure sign in methods and turn facebook on. It’ll ask you to enter the App ID and App Secret. Copy and paste the App keys that are available in the settings page of your Facebook developer account app.
-
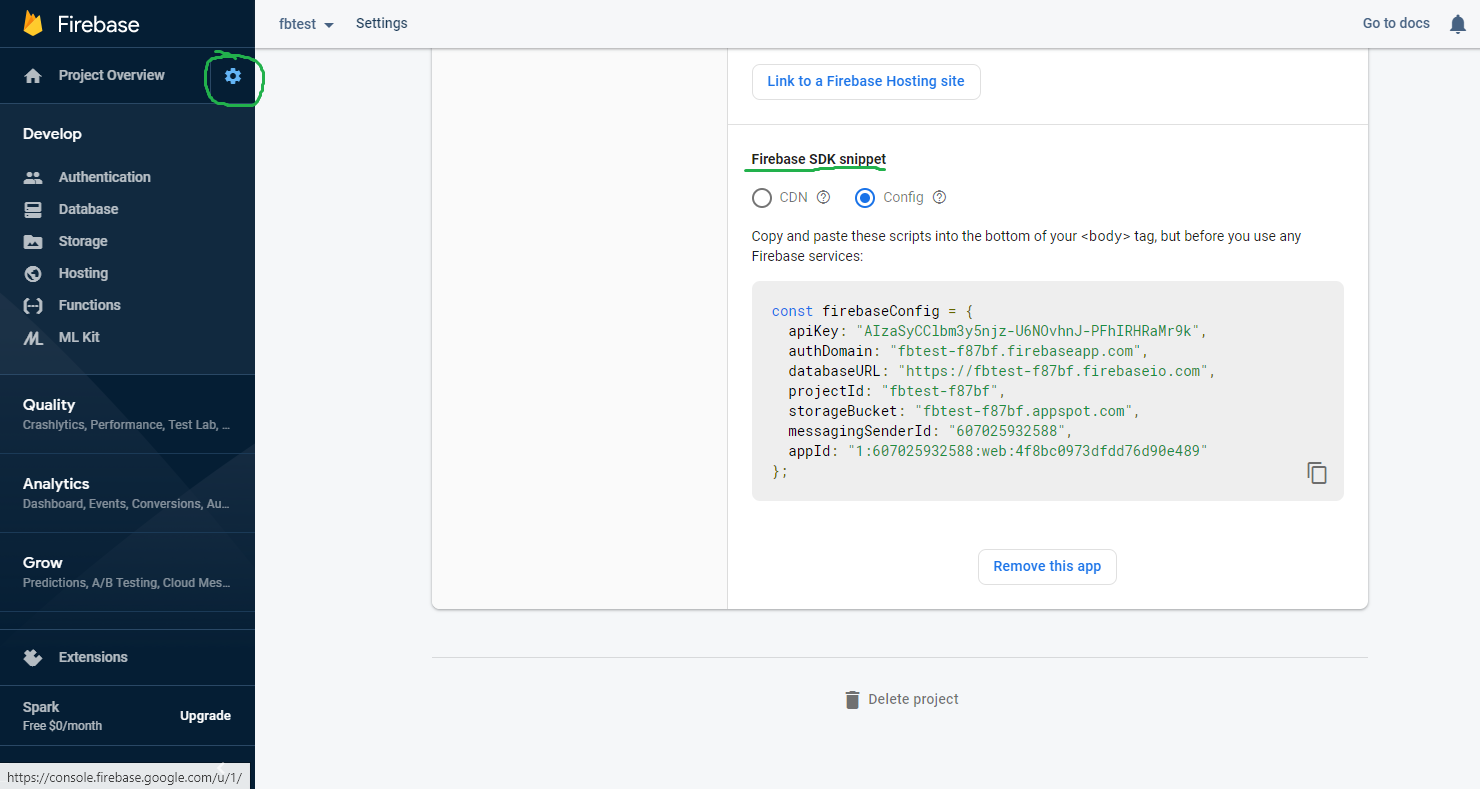
Copy the Firebase config object. Click the gear, wait for 1-2 seconds(config seconds appear a bit later, that’s why) and then scroll to bottom. Copy this object, we’ll use it on our code.
Implementing Facebook Auth
At this stage, we are ready to code our app. I am going to write all the code in App.js for demonstration purpose and simplicity sake.
- Add the imports
import * as firebase from 'firebase'; import * as Facebook from 'expo-facebook'; - Initialize the firebase in our React Native application. Add the following code and replace the firebase config object with yours.
// Your web app's Firebase configuration var firebaseConfig = { apiKey: "AIzaSyCClbm3y5njz-U6NOvhnJ-PFhIRHRaMr9k", authDomain: "fbtest-f87bf.firebaseapp.com", databaseURL: "https://fbtest-f87bf.firebaseio.com", projectId: "fbtest-f87bf", storageBucket: "fbtest-f87bf.appspot.com", messagingSenderId: "607025932588", appId: "1:607025932588:web:4f8bc0973dfdd76d90e489" }; // Initialize Firebase if (!firebase.apps.length) firebase.initializeApp(firebaseConfig); - Add the Firebase Auth Listener. This is a realtime listener, that keeps checking if the user is logged in or not.
// Listen for authentication state to change. firebase.auth().onAuthStateChanged((user) => { if (user) console.log("Logged in with user: ", user); else console.log('Not logged in') }); - Adding a Button to the app. We’ll add a TouchableOpacity with Text to create a login button. We’ll implement login functionality in our handleAuth event handler.
export default function App() { // TODO const handleAuth = async () => {} return ( <View style={styles.container}> <TouchableOpacity onPress={handleAuth} > <Text>Facebook Login</Text> </TouchableOpacity> </View>) } - Now we’ll finally hook up the Facebook OAuth and integrate it with Firebase to handle the authentication functionality.
const handleAuth = async () => {
 try {
     await Facebook.initializeAsync('219323322505831'); // enter your Facebook App Id
     const { type, token } = await Facebook.logInWithReadPermissionsAsync({
       permissions: ['public_profile', 'email'],
     });
     if (type === 'success') {
       // SENDING THE TOKEN TO FIREBASE TO HANDLE AUTH
       const credential = firebase.auth.FacebookAuthProvider.credential(token);
       firebase.auth().signInWithCredential(credential)
         .then(user => { // All the details about user are in here returned from firebase
           console.log('Logged in successfully', user)
         })
         .catch((error) => {
           console.log('Error occurred ', error)
         });
     } else {
       // type === 'cancel'
     }
 } catch ({ message }) {
     alert(`Facebook Login Error: ${message}`);
 }
}
Alight, so this concludes our topic for integrating Facebook OAuth in React Native & Expo project using Firebase. There’s still a lot more left to discuss on it. Will try to write more on authentication using Firebase. The source code is available on repository.