In this post, we are going to learn the basics of React. React is JavaScript library used for building user interfaces, created by Facebook and intially released in 2013. Meanwhile Facebook has been using it in all of its products. Facebook even created a mobile application framework React Native to create Facebook and Messenger applications.
Table of content
In this post, we will discuss and demsonstrate the following topics.
- Introduction
- Getting Started
- Components & Props
- JSX and Conditions
- State & Life-cycle
- Event Handling
- Displaying List of Elements
- Forms
Following topics will be covered in this post.
Introduction
The purpose of React is to create Single Page Applications (SPA). So basically a huge chunk of minified JavaScript generated from our project is sent to the browser and it handles all of the UI and backend interactions. Some technical things one needs to know about React. It has a Declarative Programming Style in a way, that you just declare the UI + interactions and React handles the rest. Another thing, is that React has Component Based approach. A component is essentially a Lego like UI block that is independent and can interact with other blocks.
Getting Started
Let’s start off by creating React project. First, you should have Node and Yarn installed. I prefer Yarn over NPM because it is usually faster than NPM. Also you can have Visual Studio Code as an IDE.
After that, you will be using the Create React App utility to create react project which is an officially supported method and automatically does alot of things that are considered best approaches and hectic to do manually. First use a Terminal of your choice to navigation to your desired directory or use VS Code to open desired folder if you want to use terminal from with VS Code. Shortcut to open terminal in VS Code is Cntrl+J. After that you can enter the following command:
yarn create react-app test
This command will create a react project with all the necessary things required. It can take 2-5 minutes depending on the internet connection.
Note: Previously a global package create-react-app was used for this purpose.
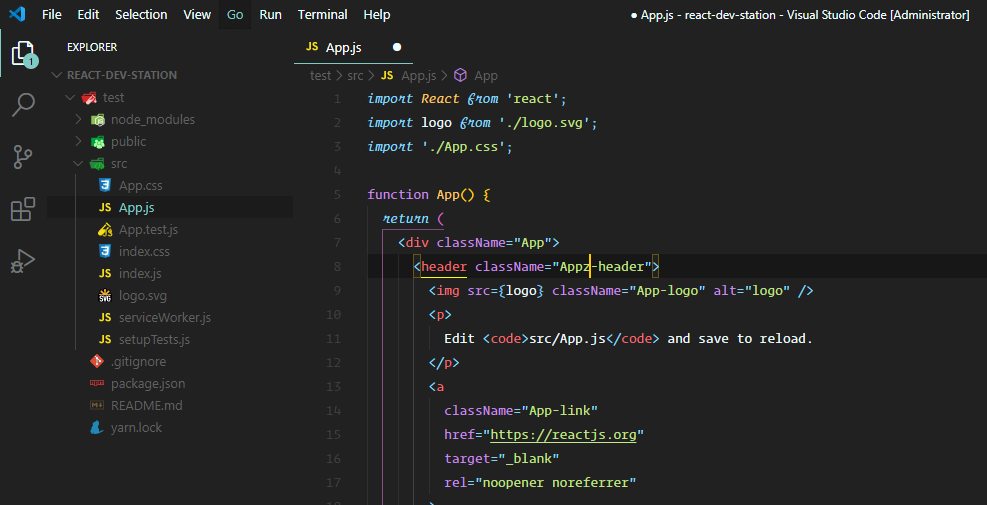
After this command following files and directory structure will be created.
Start this project by navigating to the test directory. After ensuring your terminal is in the exact directory as the one that contains package.json file, run the following command:
yarn start
It will start the project on localhost. The project auto-reload itself instantaneously if any changes are made to the src folder files.
Components & Props
Component is an independent UI block that is very similar to a Lego block. A component can be reused and can be made to interact with each other as well.
Okay, so lets proceed. The entry point of app is index.js, which is importing the App component. All of the code that we’ll be writing will go the the src folder. Lets start off by creating a folder named components within the src folder. In that folder create a file name Cafe.js in the components folder. Open that file and write the following code.
We are going to take a look at 2 type of components in React, that are Class based Components and Function based Components.
import React from 'react'

// This is how we create class based components in react; they offer full life-cycle methods and state management
class Cafe extends React.Component {
    // ignore the constructor fow now, we'll discuss in the the state management section
    constructor(props) {
        super(props) // calling the constructor of parent class
        this.date = new Date() // creating a property date wth the current date and time object
    }

    // mandatory method for a class extending React.Component
    render() {
        return (
            // See that HTML Syntax mixed with JavaScript; its called JSX
            <div>
                <Greetings dateTime={this.date.toTimeString()} message="Hello there" details="Subscribe to react dev station." />
                <ColoredBox color="red"> <p>You can send also stuff like HTML tags</p> </ColoredBox>
            </div>
        )
    }
}

// function based component; usually built for simple functionalities
function Greetings(props) {
    return (
        <div>
            <h1>{props.message} - {props.dateTime}</h1>
            <p>{props.details}</p>
        </div>
    )
}


function ColoredBox(props) {
    let style = { color: props.color }
    return (
        <div style={style}>
            {props.children}
        </div>
    )
}


export default Cafe
So we created component called Cafe. We will built upon it and demonstrate all the concepts. Cafe component is extending the React.Component, this declarative nature allows us to specify what to render when we’ll use it. Whatever we return in the render method of this class will be shown to the user. Also notice the JSX sytax which is a mixture of HTML and Javascript(ish) stuff. JSX is developed by Facebook for React. It has a very simple syntax and allows us to do complex things in a straightforward way.
Any React Component can be used as a Tag, for example we are using Greetings and Colored boxes as Tags. Whatever these functions return or component’s render return will be placed in-spot of their usage. Unlike HTML, we can also pass parameters aka props to the React components. For example we are passing message and details to the Greetings component. We can also pass markup to the component, as in the ColoredBox example, we are passing markup and parameters. Markup are accessed in the component using props.children.
Props are the parameters that are passed to a component via HTML attributes.
Also note the last statement in the code. Export statement allows us to export modules in JS.
But we still haven’t used the Cafe component in our App. Replace the following code in the App.js.
import React from 'react';
import logo from './logo.svg';
import './App.css';

import Cafe from './components/cafe'


function App() {
  return (
    <div className="App">
      <Cafe/>
    </div>
  );
}

export default App;
We first import the Cafe component using relative paths. After that, we use the tag shorthand syntax to use Cafe component, since we are not passing any markdown or props to the Cafe. This will render our Cafe component in the App now.
JSX and Conditions
JSX allows us to write JavaScript expressions within HTML code. JSX stands for JavaScript XML.
Ok so in the last section, we took a look at the JSX. Its time to view it in details. Modify the App component in the app.js file as below:
function App() {
  let hours = new Date().getHours() // get the hours from current datetime
  return (
    <div className="App">
      {/* conditional rendering in JSX */}
      {hours < 12 && <h3>Sorry, we are closed</h3>}
      {/* shorthand syntax for using components */}
      <Cafe />
    </div>
  );
}
In this example, we want to tell user that the cafe is closed if the current hour is less than 12. So basically, we want to use conditional rendering with JSX. The first thing to know is that, whenever we open the curly brackets {} within HTML, then it means we want to write JavaScript code in it. However, we can only add single line code within JavaScript, therefore if we want to return more data then we can create a new method with optional parameters and return JSX from it.
State & Life-cycle
State object is used to store values and is provided by React.Component. Whenever the state of a component changes, it react also re-renders that component.
State is a vital concept in the React. It’s quite easy to understand the basics, but it takes some practice to create a mindset for dealing with state. Lets modify our Cafe component to make use of state.
class Cafe extends React.Component {
    constructor(props) {
        super(props)
        this.state = { date: new Date() } // initializing our state object
    }

    // Only for demonstration, anything done in this method can be and should be done in the constructor
    componentDidMount() {
        // we want to update the time shown to user every second
        setInterval(() => {
            this.setState({ date: new Date() })
        }, 1000)
    }

    componentWillMount() {
        // we want to clear the Window.interval object after the component is destroyed so that it doesn't just keeps going on in the
        // background
        clearInterval()
    }

    render() {
        return (
            <div>
                {/*after the state.date is updated, the UI will be updated automatically*/}
                <Greetings dateTime={this.state.date.toTimeString()} message="Hello there" details="Subscribe to react dev station." />
                <ColoredBox color="red"> <p>You can send also stuff like HTML tags</p> </ColoredBox>
            </div>
        )
    }
}
A lot is going on but it’s quite simple. First thing to notice is the initialization of the state object. It is initialized as a normal Javascript object. We create a Datetime object and assigned it to the state.date property. This Datetime object holds the current date and time values. In the render section, we pass this value to the dateTime prop to Greetings component. Whenever, this value is updated the UI will be updated automatically.
One very important thing is that we can’t simply alter the values of state directly. Thats because React won’t be able to keep track of it according to docs. But they have provided a method called setState to update it. In the setState method, we pass a new object with only the values that we want to change. For now, this information is suffice.
Now let’s discuss the life cycle process of a React Component. When we create a Class-based component, we have access to life-cycle methods.
Life-cycle methods allow us to hook into React Component Life-cycle and override it.
The flow of a React component is “Mounting, Updating and then Unmounting”. More details are available in the official diagram. There are several methods available to override for example render(), shouldComponentUpdate(),componentDidMount(), componentWillUnmount() etc.
We have used componentDidMount in our example to start a JavaScript Interval Object. We are passing an anonymous function to it with an interval of 1000 ms (1 second). This interval will call our function every 1 second. Thus our state.date will be updated each second and it will be reflected on the UI automatically. We are also using componentWillUnmount() method to clear the Interval object once the component is removed. We have to do it, because Interval is part of the Window object and it will keep on running in the background event when the component is destroyed, crashing our program at best, usually not clearing resources can lead to memory leaks.
Event Handling
So far, we were just a passive watcher. But now we will interact with the app. We are going to add an onClick event handler in the Cafe component. To keep it concise, life-cycle methods are not shown in this example.
class Cafe extends React.Component {
    constructor(props) {
        super(props)
        this.state = {
            uselessCounter: 0,
            date: new Date()
        } // initializing our state object
    }
    // componentDidMount and componentWillUnmount are hidden on purpose

    handleClick = () => {
        this.setState({ uselessCounter: this.state.uselessCounter + 1 })
    }

    render() {
        return (
            <div>
                <Greetings dateTime={this.state.date.toTimeString()} message="Hello there" details="Subscribe to react dev station." />
                <ColoredBox color="red"> <p>You can send also stuff like HTML tags- {this.state.uselessCounter}</p> </ColoredBox>
                {/* here we wire our handleClick event handler with onClick event*/}
                <button onClick={this.handleClick}>Useless Counter Button</button>
            </div>
        )
    }
}
So we created a new button in the Cafe render method. Whenever, this button is clicked, we want to increment the “uselessCounter”, which is being passed to ColoredBox as children. We just provide the handleClick method to the onClick event and then use setState to update the counter value.
Another thing to note, when we create a function withing a class, it becomes it’s method. We can access methods using this.methodName. Also note the syntax of handleClick method, this syntax is called an Arrow Function and its details are on link. We use arrow functions in event handlers especially to avoid issues with the this object. Using ES6 arrow function allows us to access avoid conflicts and access class methods and properties using this.
Displaying List of Elements
Ok so this time we are going to see how to display a list of items in React using JavaScript array map function and ES 6 arrow function syntax.
const DATA = [
    { name: 'Bread', price: 20 },
    { name: 'Tea', price: 10 },
    { name: 'Egg', price: 5 },
]

class Cafe extends React.Component {
    // Rest of the code remains same
    // Only updating the render method
    render() {
        return (
            <div>
                <Greetings dateTime={this.state.date.toTimeString()} message="Hello there" details="Subscribe to react dev station." />
                <ColoredBox color="red"> <p>You can send also stuff like HTML tags- {this.state.uselessCounter}</p> </ColoredBox>
                <button onClick={this.handleClick}>Useless Counter</button>
                <h3>Menu</h3>
                <ul>
                    {DATA.map((item, index) => (
                        <li key={index}>{item.name} - {item.price} </li>)
                    )}
                </ul>
            </div>
        )
    }
}
We added some more code to the render method to display a list of products in our Cafe menu. For this purpose, we are using map function of array. It basically allows us to iterate over each item of the array and perform any action on it and then return another copy of array. In our case, we create JSX for each item and an array of JSX items is returned, which is then rendered by React. React also requires key on the list items to keep track of changes, normally the ID of an item can be used as key, but this time we are going to use index as key which is provided by the map function.
Forms
Okay, so this time we are going to implement a typical flow of information in React. We will understand the mindset needed to deal with states and how components interact with each other.
class Cafe extends React.Component {
    constructor(props) {
        super(props)
        // This time we arr assigning the DATA content to our state.products property
        // because we want to update the UI automatically when a new product is added
        this.state = { products: DATA, date: new Date(), uselessCounter: 0 }
    }

    // ignoring componentDidMount and componentWillUnmount methods on purpose
    // We can also use functions to return JSX and HTML code
    renderBody = () => {
        // wrapping the JSX with round brackets () for code readability
        return (
            <div>
                <Greetings dateTime={this.state.date.toTimeString()} message="Hello there" details="Subscribe to react dev station." />
                <ColoredBox color="red"> <p>You can send also stuff like HTML tags- {this.state.uselessCounter}</p> </ColoredBox>
                <button onClick={this.handleClick}>Useless Counter</button>
                <h3>Menu</h3>
                <ul>
                    {/*We are using state.products to render list of items*/}
                    {this.state.products.map((item, index) => (
                        <li key={index}>{item.name} - {item.price} </li>)
                    )}
                </ul>
            </div>
        )
    }

    render() {
        return (
            <div>
                {/* using renderBody method; which returns JSX */}
                {this.renderBody()}
                <ProductForm handleSubmit={this.addToMenu} />
            </div>
        )
    }

    // this method will be passed as props, so that the Form component can call it and we can add new element to our state.products
    // when new item is added to the state.products, it will be reflected in the UI automatically
    addToMenu = (newProduct) => {
        // we create a copy of previous state.products, add a new item to it and return this new copy
        // this copy is then assigned to the state.products
        this.setState({
            products: [...this.state.products, newProduct]
        })
    }

    handleClick = () => {
        this.setState({ uselessCounter: this.state.uselessCounter + 1 })
    }
}
// code for the ProductForm Class-based component is hidden for now
Ok so, we did some restructuring to the Cafe component. In this example, we want to add new products to the menu. The first step for this is to assign the DATA to our state, since state changes are re-rendered automatically. React takes a look at where the changes happened and then updates the UI. Therefore, we assigned DATA to the state.products property. After that, we had to write code to add a new element into this state.products array. Keeping in mind, we can’t mutate the state directly thus we can’t simply call state.products.push(newItem). It is because of the fact, that React prohibits it as it won’t be able to track such changes. Thus we have to create a copy of that array and add new element to it and then assign this copy to the state.property using the setState method. We will pass this addToMenu function to the children component, so that it can be called to update the state with the values from the children component.
Now lets take a look at the ProductForm component and see how we deal with form inputs using React.
class ProductForm extends React.Component {
    constructor(props) {
        super(props)
        this.state = {
            name: '',
            price: 0
        }
    }

    // We wired onChange event of inputs with this method to keep the states updated
    handleChange = (event) => {
        // we are using ES6 named property syntax here to write one-line code to handle all input changes as long as
        // their names match the state property names
        // event.target provides information about the element which triggered the event
        this.setState({
            [event.target.name]: event.target.value
        })
    }
    handleSubmit = (event) => {
        event.preventDefault() // preventing form default submit behavior
        this.props.handleSubmit(this.state) // calling the addToMenu that was passed from Cafe component as handleSubmit prop
        this.setState({ name: '', price: 0 }) // resetting the form field
    }
    render() {
        return (
            <form>
                <input type="text" name="name" value={this.state.name} onChange={this.handleChange} required />
                <input type="number" name="price" value={this.state.price} onChange={this.handleChange} required />
                <button onClick={this.handleSubmit}>Submit</button>
            </form>
        )
    }
}
In the ProductForm, we are maintaining two properties in the state, which are wired to the value of the inputs. Whenever the value of the input is changed their corresponding state property is updated. We don’t have to write the onChange event handler for each input as we can just use ES6 named property syntax. The only thing interesting here is how we use the props.handleSubmit function. We pass addToMenu method as a prop named handleSubmit to the ProductForm. We just pass the current state object to addToMenu function. In that function, we add a copy of that object and add to the new created array, this new array is then assigned to the state.products of the Cafe component. React matches the previous_state with the new state for the changes and then updates the UI.
This concludes the basics of React. We covered a lot of content. However, more practice is required to master these skills further. There’s still a long way to go and I’ll write more stuff on React. The source code of this project is available on Github Repo.